 |
| My beautiful twin sister, Elisa, wearing her cowl. |
I love working with thicker yarn. I love big funky buttons. I love neutral colors that go with EVERYTHING. I’m a sucker for a cute crocheted cowl pattern. Because of all of those reasons, I fell in love with this FREE cowl pattern.
I found the pattern here: http://www.fiberfluxblog.com/2014/09/free-crochet-patternmargaret-button-cowl.html
 |
| Elisa wearing the cowl in Oatmeal. |
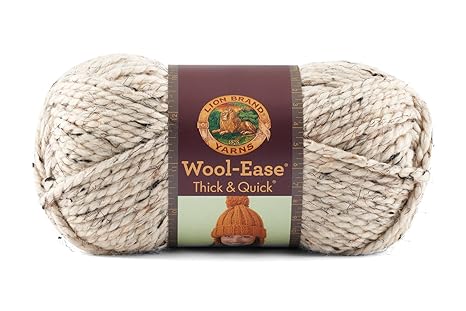
I used Lion brand Wool Ease Quick and Thick in Oatmeal (I’ve also done one in a light grey color). This yarn comes in some super fun colors, but I decided on a more neutral color so that it would go with pretty much any outfit. Because of the nature of this pattern, it is very flexible and self-adjusting. It basically is a big rectangle with a large decorative (yet functional) button sewed on in one corner.
I used a 9mm
crochet hook and around 1 ½ skeins of yarn. The pattern consists entirely of
single crochet, double crochet, and chaining. Super easy and is a nice looking
chunky pattern. The holes in the cowl mean it is versatile when putting in on because
the large button will fit in any of those holes. It took me a couple of hours
to crochet the cowl (did I mention I love working with thick yarn?!)
I made this
as a gift for my twin sister and when I brought it into work to show my
co-workers, my friend Mari loved it so much she asked me to make one for her
daughter.
 |
| The matching cowl and hat set made with Grey Marble. |
 Because it
works up so fast, I decided to make a cowl and hat set to donate to a silent
auction for United Way. I used a simple hat pattern that I found on Ravelry.
Here is the link: http://www.ravelry.com/patterns/library/hubbys-chunky-hat
Because it
works up so fast, I decided to make a cowl and hat set to donate to a silent
auction for United Way. I used a simple hat pattern that I found on Ravelry.
Here is the link: http://www.ravelry.com/patterns/library/hubbys-chunky-hatI wanted a hat pattern that also used a 9mm crochet hook so that I could use the exact same yarn as the cowl to make it a complete set.
 |
| Because of the design of the cowl, the button can be pulled through any of the many holes. |
After completing the cowl, determine the best placement for your button by trying it on first. I put my button at least 3 rows in and 3 rows up from the corner.
To wear the
cowl, you simply fold over the top by a couple of inches and then secure with
the button wherever it looks and feels the best.


