Showing posts with label Recipe. Show all posts

Thursday, July 7, 2016

Mini Key Lime Cheesecake Bites

Mini key lime cheesecake bite. Can you say decadent and delicious?!


Many states have a wonderful co-op called Bountiful Baskets where you can get fruits and vegetables for super cheap! It is run entirely by volunteers so it is expected that you help out every now and then.  I have been starting to get my fruits/veggies from them about every other week. Here is the website where you can find more info: https://contributions7.bountifulbaskets.org/

Since you don’t know what you will get in your basket, sometimes you’ll get something you have never tried before. Or something you don’t know what to do with. This was my basket a few weeks ago.


You'll notice some butter lettuce, a small watermelon and cantaloupe, grapes, bananas, green onions, potatoes, carrots, corn, nectarines, key limes, and a dichon root.


I had never cooked/baked with key limes before – in fact, I wasn’t even aware of the fact that key limes are smaller than regular limes. Since I didn’t really know what to do with them, I started looking at Pinterest boards to get ideas. I came across a super delicious looking key lime cheesecake recipe that had only 7 ingredients. Seven! Here is the gal’s blog post: http://sallysbakingaddiction.com/2015/06/29/key-lime-pies/


I started by running the key limes under warm running water and then rolling them on the counter to get the juices flowing. Then, I cut them in half and gently squeezed each half over a cup to collect the juice. Half a cup is needed for this recipe. There is a surprising amount of juice that comes from one key lime! This recipe took about 5-6 key limes.


Squeeze all that juice out!


Set aside the key lime juice to use later in the filling.

To make the crust, I crushed 10 full graham cracker sheets inside a Ziplock bag with my rolling pin. Then, I added 6 Tablespoons of melted butter and 1/3 cup sugar and gently mixed until combined.


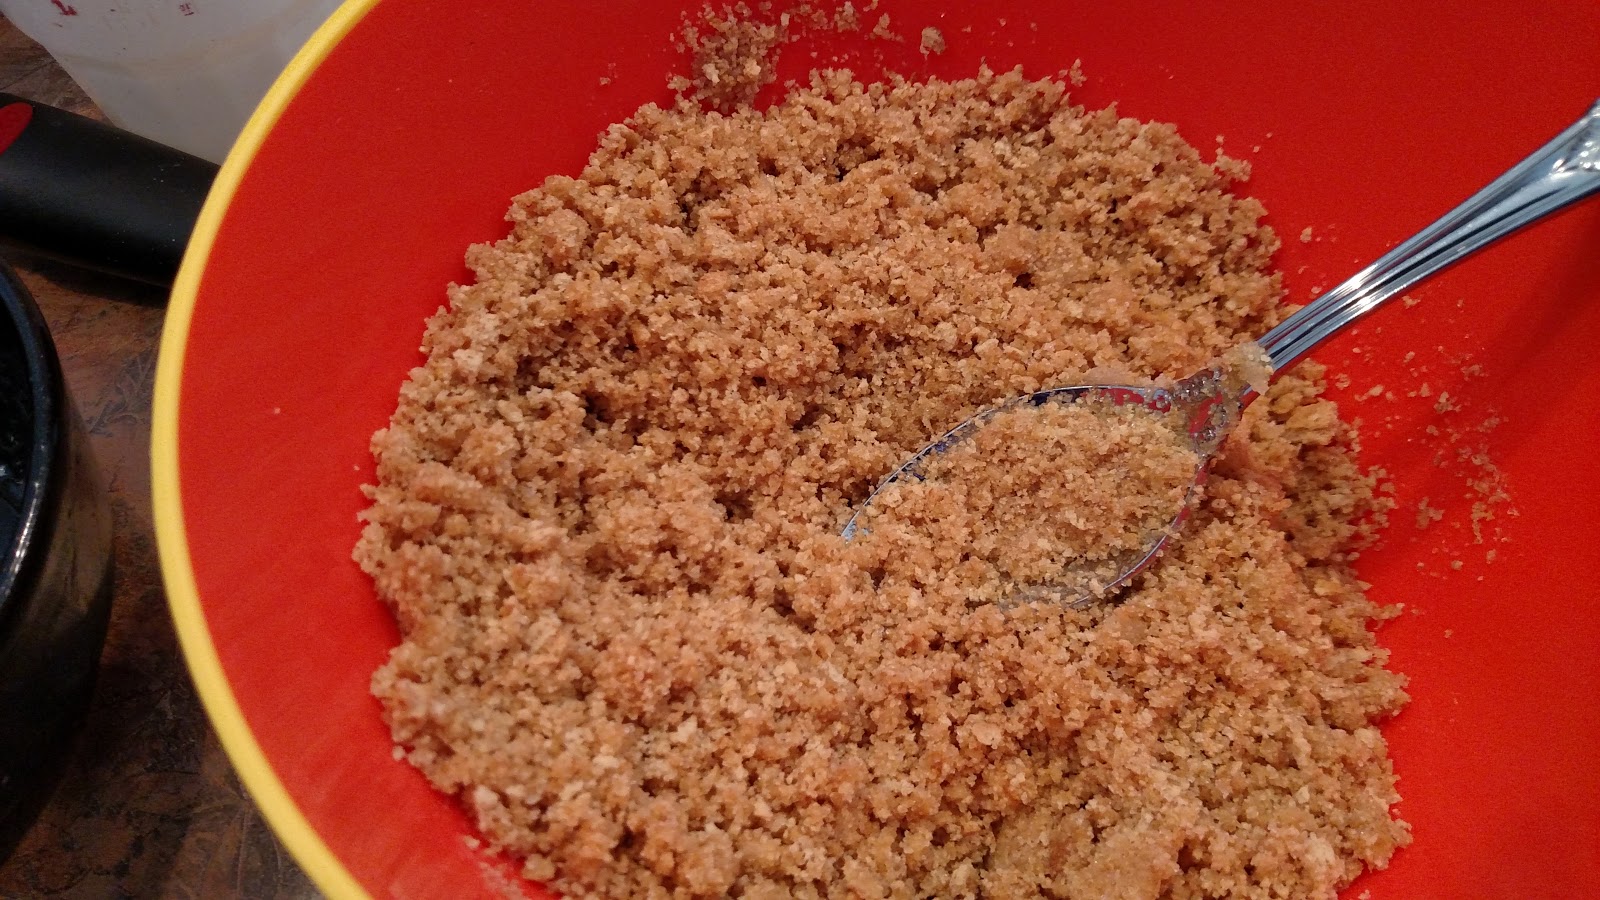


I only own 2 muffin tin pans that make 6 each. This recipe makes around 16 full size muffin tin size cheesecakes. The leftover crust I had was used in my mini tart pan. I sprayed the pans with Pam and then gently scooped a heaping tablespoon in each large muffin cup and a little less than 1 tablespoon in the small tart pan. Gently press down using your fingers to make a crust on the bottom of the tin. Pre-bake these at 350 degrees for about 5 minutes.


The filling is made by using a mixer to whip up 4 oz of cream cheese, then adding 4 egg yolks and mixing further. Then, add 1 can of sweetened condensed milk and ½ cup of key lime juice. Mix on medium for another minute.


After the filling is all blended, use a tablespoon to scoop some of the mixture into each muffin tin. The large ones will take 2 tablespoons of filling, the mini ones will take around 1 tablespoon. The mixture won’t expand/rise so it’s ok to fill them almost completely full.


Bake at 350 for about 10-15 minutes until the middle is almost completely set. I took out the mini tarts after about 12 minutes. I let the big ones go until 15 minutes.


Then, remove from oven and let cool completely on the counter. After cooled, place pans in refrigerator to cool for a few more hours to set. They can be left in the fridge overnight as well. To eat, scoop out of the muffin tins and put a dollop of whipped cream on top. Yummmmm. The taste of summer! J


Mini Key Lime Cheesecake Bites

Crust:
10 full sheets of graham crackers (about 1 1/2 cups)
6 Tablespoons of melted butter
1/3 cup of sugar

Filling:
4 oz. softened cream cheese (full-fat version)
4 large egg yolks
1 (14 oz) can sweetened condensed milk (full-fat version)
½ cup of key lime juice (I used about 5-6 fresh key limes to get this amount)

Instructions:

Preheat oven to 350. 

Crush graham crackers with a rolling pin. Combine crushed graham crackers, melted butter, and sugar together to form a crumbly crust. Spray muffin tin pans (or use liners). Put one heaping tablespoon of crust mixture into each regular size muffin tin. If using small muffin tin, use 1 heaping teaspoon of crust mixture. Gently press the crust mixture into the bottom of the pan. Pre-bake at 350 degrees for 5 minutes (I put the mini muffin tin pan on the top and the regular muffin tin pans in the middle).

To get the most juice out of your lime, run warm water over it and roll it back and forth on the table top. Then, cut each lime in half and squeeze the juice into a container. You need ½ cup of lime juice for this recipe. It took 6 key limes. You can use store bought juice though if needed.

On high speed, beat the cream cheese until soft and then add the egg yolks. Beat for another minute. Add sweetened condensed milk and key lime juice and beat at medium for another minute. Now you are ready to fill each crust with the filling mixture! Scoop 2 Tablespoons of the filling into each regular sized muffin tin. For the smaller ones, a heaping tablespoon should do it. Since these don’t rise during baking, you can fill them pretty full.

Bake at 350 degrees for 10-15 minutes until the center is no longer jiggly. I baked the mini ones for 12 minutes and the larger ones for 15.

Let cool at room temperature. After completely cooled, put in refrigerator for a few hours or overnight. Keep them in the pan while cooling in the fridge to let them set all the way before trying to take them out of the pan.
Enjoy with some whipped topping!
Yield: 16 regular muffin size cheesecake bites or 12 regular and 20 mini cheesecake bites. 


Sunday, November 22, 2015

Old fashioned creamy homemade caramels


So, what makes a caramel taste so good? I believe a good caramel should be creamy, buttery, smooth and just the right amount of chewy. Not too hard so it turns into brittle. Not too soft that it never really sets. I've had some microwave caramels from co-workers and they just don't compare to this recipe. They were really grainy in texture. Years ago, I worked with a girl who made some AMAZING caramels. They literally melt in your mouth. I asked her for the recipe and she graciously shared it.
The first year, I made some for Christmas to share with friends, family, and co-workers. The next year, I was already getting requests to make some more of my caramels. I knew the recipe was a keeper! Although this recipe is pretty labor intensive, it is completely and totally worth it. It is usually a full day process.  I make a few batches every year around the holidays but have even been known to make it in the middle of the summer. One year, I made an entire batch for my brother-in-law for his birthday and mailed it to him in Tennessee. He likes it that much, too. :)
So, in the spirit of sharing, I give you my famous caramel recipe. I have learned some tips and tricks from making this recipe SO MANY times over the years. As I go through the steps, I will share these tips with you. Although you don't have to follow the tips, it will make the process much smoother if you do. Happy baking! 

First off, here is the recipe:
Ingredients:
1 lb of butter (I used Hornbachers sweet cream butter) DO NOT substitute margarine
1 lb (2 heaping cups) of brown sugar (light or dark)
1 cup of light corn syrup
1 can (14oz) sweetened condensed milk
1 tsp. vanilla
Smoked sea salt (can omit)
Dash of salt (if using unsalted butter)


Supplies you will need to have on hand: 
4 Qt pot (could get by with smaller but I like to have room to stir)
Spatula that will hold up under high temperature (my Zyliss silicone one is perfect!)
A digital meat thermometer (better than a candy thermometer because it is more accurate)
Pam cooking spray to prevent sticking
Jelly roll pan with a slight lip

First BIG tip: prepare everything before you even begin. When I say everything, I mean everything. Measure out your brown sugar and put it in a bowl. Open the can of sweetened condensed milk so it's ready to pour. Measure out the corn syrup (I like the Alton Brown plunger cup for sticky liquids like syrup because it cuts down on the time it takes to get everything out of the cup.)


Measure out the vanilla and put it in a little bowl. Spray your jelly roll pan. Put all ingredients close by the stove within reach. Have the thermometer and probe readily available. Take a bathroom break. Seriously. Once you begin the process of making these caramels, you CANNOT walk away.


  You will be standing at the stove stirring constantly until it reaches the correct temperature. Do not walk away. Do not stop stirring. That is the biggest tip I can share to make this recipe a success.


So, now on to making the caramels: Melt butter in pan on medium heat. I usually let the butter sit on the counter to get to room temperature before melting. It goes faster that way. Throughout this entire recipe, the temperature on the stove should not be above medium. Slow and steady is the secret. My impatient husband once tried to hurry along the recipe by blasting the heat. The end result was not only disappointing, it was hardly edible.


Melt the butter completely and then add the brown sugar. If you used unsalted butter, feel free to add a dash of salt. I don't bother doing that part because I typically use salted butter.

Stir the brown sugar into the mixture until there is NO butter on top. It is important that each ingredient gets added only after the previous ingredient has had a chance to fully incorporate.

The brown sugar is NOT entirely incorporated in this picture.
Make sure it is completely melted before going on to the next step.

The butter and brown sugar is completely melted together and you are ready to add the corn syrup.


Add the corn syrup slowly, stirring the entire time.


Slowly add the sweetened condensed milk, stirring constantly. Notice that stirring has been a pretty important part of the instructions so far. I didn't even dare take a picture of this part because I didn't want to stop stirring that long. My sweet husband assisted in the photography.


Doesn't that look beautiful? Yummmmm.


Now that your main ingredients are all combined, it is time to stir. Hope you aren't sick of stirring yet, because you have a fair bit of stirring coming up. Cook until the temperature of the caramel reaches 245 degrees. When measuring the temperature with the probe, make sure you are moving the probe around so that you are still able to scrape the bottom of the pan constantly so nothing burns on.


The temperature rises pretty quickly to 230 degrees. Those last 15 degrees seems to take forever. Sometimes, the temperature will rise a degree or two, and then fall again. Another tip: make sure the tip of the probe doesn't touch the bottom of the pan - that will give you a false temperature (much higher than what it actually is.)


The caramel will quickly start to boil with lots of bubbles rising to the surface. This is what the caramel typically looks like at about 230 degrees. Be very careful stirring because this mixture is not only very hot, it is super sticky!

Once the temperature pretty consistently stays at around 243 degrees, I pull it from the heat and add the vanilla. It will bubble up and sizzle so stir quickly.


Pour entire contents of pot into the prepared jelly roll pan. If you wait until the thermometer reads 245, it will likely be too hot by the time you add the vanilla and pour it into the pan. That makes the caramels slightly crunchy, which I don't like. The temperature will continue to rise even when you pull the pot and add the vanilla, so I error on the side of pulling it a few degrees under 245. 


Now comes the secret ingredient. My mother-in-law found this amazing smoked sea salt and it is the PERFECT addition to these sweet, smooth caramels. I sprinkle some on the entire batch and let it cool for a few hours.


After the caramel has had a chance to cool for a few hours, it is time to start cutting and wrapping. Since you sprayed the pan beforehand, the caramel comes out quite easily. I start on one end and slowly peel it off the pan. Have some cutting boards/mats ready to put the caramel on. I use a sharp pizza cutter to cut thin strips of the caramel and then cut the strips into little chunks. Feel free to cut whatever size and shape you fancy!


 Don't cut too many pieces at once. Start off with a few strips and then immediately wrap them with pieces of parchment paper or wax paper. I once cut them all up in the beginning and put them in a bowl. Since the caramel is still pretty soft, the pieces began to melt together and I had a big mess. Cut one or two strips at a time and wrap up all of those chunks, then go cut another strip and continue the process.


I used wax paper because I think it is a little easier to work with because it isn't as stiff as parchment paper. But, use whatever you have on hand. The wax paper allows you to see the caramels whereas the parchment paper offers the opaque white look.


 It's slow going, but I promise it's worth it! Keep cutting and wrapping...the end is almost near!
The finished product (minus the couple of caramels my husband and I ate
while I was wrapping...have to do quality control, right? :)