Saturday, January 16, 2016

Fingerless gloves crochet pattern

Close-up of one of the fingerless gloves made with CARON Simply Soft in the color Sticks and Stones

Tis the season for really cold weather. I mean REALLY cold. This weekend, the temp is supposed to be around 20 degrees below zero, and the windchill 45 degrees below zero. Yikes. That’s enough to keep anyone inside. I think I’ll cozy up with my heated blanket and a cup of tea and crochet the day away. J

If you are looking for a good crochet project for a day like this, search no further! THIS PATTERN is a quick, fairly easy pattern that doesn’t use a lot of yarn. My older sister, Stacey, like me, is always cold. Her office area is often colder than she’d prefer so she requested that I make her a pair of fingerless gloves so she could wear them while she types. I found this pattern and decided to give it a try. I used CARON Simply Soft yarn in Spring Brook.


Supplies needed: 
CARON Simply Soft yarn (or another worsted weight yarn)

4.25mm or 4.5mm hook

4 buttons (if you are going to use them, aren't needed)


The unusual stitch in this pattern is the puff stitch. It takes a little practice to master but isn’t too difficult. HERE is a tutorial on how to do the puff stitch.   The biggest advice I can give you regarding this stitch is to not start off too tight when doing the first couple of loops on the hook. If you tend to crochet tight stitches (like me), you will have to loosen up your stitches a little bit in order for the hook to cleanly go through all of the loops. The video describes and shows that very nicely.
These fingerless gloves are made with CARON Simply Soft in the color Spring Brook

I made several alterations to the pattern. Since I did not have a 4.5mm hook, I used a 4.25mm hook. I also made the thumb holes bigger because I don't like feeling like it is cutting off circulation. In Row 5, where the thumb hole is made, I crocheted 6 chain stitches instead of 3. I also didn’t use buttons. So, in rows 4 and 8, I skipped the button holes. After Row 12, I single crocheted the two sides together to connect the piece into a cuff. 


Stacey liked the first pair I made for her so much that she requested another so she could keep one at home and one at work. The other color (brownish, pictured below) is called Sticks and Stones. They are both CARON Simply Soft. 


I liked using variegated yarn colors for this pattern because with the puff stitch, you don’t end up seeing a “pattern” of a certain color of yarn always being in a certain part of the project. The puff stitch uses up enough yarn in each stitch that you don’t end up with weird stretches of color in your project.


When you finish your fingerless gloves, put them on and use them to crochet your next project! J


Wednesday, January 13, 2016

Waffle weave crochet pattern


So, I LOVE the look of this basket weave crocheted baby blanket. It looks more like a knit pattern, but it is actually crocheted! It involves a couple of more advanced stitches, but once you get the hang of them, it is a piece of cake! 

I used Loops and Threads Charisma yarn from JoAnn Fabric. I’ve made this blanket a few times – the first time in Charcoal and the next time using Off White with a Dark Blue border.

 I like the Charisma yarn because it is thicker and works up fast, but is also soft and machine washable and dryable (super important qualities to have when making a baby blanket!) 


The hook suggested is an 8mm hook, but I only had a 9mm so I used that instead. I followed this pattern:  http://www.deliacreates.com/nesting-basket-weave-crochet-baby/

My friend, Jackie, sent me this picture (above right) of the blanket I made for her sweet baby boy Emmett. Doesn’t it look so cute hanging on the edge of the crib with the adorable sign above? For this blanket, I used 6 balls of Off White and 1 ball of Dark Blue for the border. 


I had learned how to do a front post double crochet and back post double crochet stitch when making some cute baby booties before, so I was familiar with the stitch. It is actually easier to do with thicker yarn and a bigger crochet hook, so this is a perfect pattern to learn how to do this stitch. Here is a link to a GREAT tutorial on how to do the front and back post double crochet stitch: https://crochetwithpassion.wordpress.com/2013/11/06/front-and-back-post-double-crochet-tutorial/ Just remember that it is the front and back POST you are focusing on, not the loops. The post is the upright, vertical part of the stitch.


As you start working on this pattern, you won’t see the basket weave pattern right away. The pattern requires you to alternate every 4 rows. After 8 or 12 rows, you will start to see the pattern emerge. Keep in mind, you need to end your pattern on  a multiple of 4 so you don’t break the pattern halfway through.


In this picture, I purposely placed my foot next to the blanket 
so you can see the size of the baby blanket. 
Pretty pink toes, right? 


The little laminated sticky label in the corner is one of the coolest creations on the planet! It is a personalized label from NameBubbles that is washable and super sticky.  I love putting the label on it to remind the recipient that the gift was made with lots of love.


 If you are wondering if these labels are worth the money, let me tell you they absolutely are! I bought the laminated washable ones so that they will hold up in the wash. Here is the link to their website: http://www.namebubbles.com/Default.aspx  


I used to work at a child care center and one of the little boys in my room had a laminated sticker on his blanket. It was washed MANY MANY times and still looked brand new and still stuck to the material. Great way to label your child’s clothes or belongings so they don’t get lost at daycare.
Happy crafting everyone! :) 


Sunday, December 6, 2015

Ribbed Cowl Crochet Pattern

I have been itching to try a different crochet pattern with some new yarn! I found this fun new chunky yarn at JoAnn Fabrics the other day and HAD to buy it. The brand is buttercream and it comes in beautiful colors (I particularly liked this deep olive green).  It is 80% acrylic and 20% alpaca. I wasn't sure what I was going to make with it yet but I figured divine inspiration would hit sooner or later.

After searching on my Pinterest board (https://www.pinterest.com/erinkit/crochet-ideas/) for a while, I settled on this fun ribbed cowl pattern. I have SO many patterns on my Pinterest board it becomes a bit overwhelming to look through and find patterns I haven't done before. That's what I get for being addicted to Pinterest. So many patterns, so little time.


Click Here to get to the pattern I used to create this cowl. I used a 10mm crochet hook. I love projects with chunky yarn! They have such unique texture to them and they work up so fast.


This pattern is super easy (great 
for beginners!) because it is all in single crochet. The only "tricky" part is learning to single crochet in the back loop only. That is what creates the ribbed look. The link I've provided for the pattern has a great picture that shows what crocheting in the back loop means. There are also great videos that describe how to do that on YouTube. Once you figure that part out, the rest is super easy! Just go back and forth until the cowl is as wide as you'd like it.


I kept to the pattern because I wanted it nice and long so that it could be doubled up around my neck. I used ALMOST two whole skeins of buttercream yarn (the leftover amount is what's in the picture of the yarn). After stitching the two ends together to create an infinity scarf and tying in loose ends, it was ready to wear!


Sunday, November 22, 2015

Old fashioned creamy homemade caramels


So, what makes a caramel taste so good? I believe a good caramel should be creamy, buttery, smooth and just the right amount of chewy. Not too hard so it turns into brittle. Not too soft that it never really sets. I've had some microwave caramels from co-workers and they just don't compare to this recipe. They were really grainy in texture. Years ago, I worked with a girl who made some AMAZING caramels. They literally melt in your mouth. I asked her for the recipe and she graciously shared it.
The first year, I made some for Christmas to share with friends, family, and co-workers. The next year, I was already getting requests to make some more of my caramels. I knew the recipe was a keeper! Although this recipe is pretty labor intensive, it is completely and totally worth it. It is usually a full day process.  I make a few batches every year around the holidays but have even been known to make it in the middle of the summer. One year, I made an entire batch for my brother-in-law for his birthday and mailed it to him in Tennessee. He likes it that much, too. :)
So, in the spirit of sharing, I give you my famous caramel recipe. I have learned some tips and tricks from making this recipe SO MANY times over the years. As I go through the steps, I will share these tips with you. Although you don't have to follow the tips, it will make the process much smoother if you do. Happy baking! 

First off, here is the recipe:
Ingredients:
1 lb of butter (I used Hornbachers sweet cream butter) DO NOT substitute margarine
1 lb (2 heaping cups) of brown sugar (light or dark)
1 cup of light corn syrup
1 can (14oz) sweetened condensed milk
1 tsp. vanilla
Smoked sea salt (can omit)
Dash of salt (if using unsalted butter)


Supplies you will need to have on hand: 
4 Qt pot (could get by with smaller but I like to have room to stir)
Spatula that will hold up under high temperature (my Zyliss silicone one is perfect!)
A digital meat thermometer (better than a candy thermometer because it is more accurate)
Pam cooking spray to prevent sticking
Jelly roll pan with a slight lip

First BIG tip: prepare everything before you even begin. When I say everything, I mean everything. Measure out your brown sugar and put it in a bowl. Open the can of sweetened condensed milk so it's ready to pour. Measure out the corn syrup (I like the Alton Brown plunger cup for sticky liquids like syrup because it cuts down on the time it takes to get everything out of the cup.)


Measure out the vanilla and put it in a little bowl. Spray your jelly roll pan. Put all ingredients close by the stove within reach. Have the thermometer and probe readily available. Take a bathroom break. Seriously. Once you begin the process of making these caramels, you CANNOT walk away.


  You will be standing at the stove stirring constantly until it reaches the correct temperature. Do not walk away. Do not stop stirring. That is the biggest tip I can share to make this recipe a success.


So, now on to making the caramels: Melt butter in pan on medium heat. I usually let the butter sit on the counter to get to room temperature before melting. It goes faster that way. Throughout this entire recipe, the temperature on the stove should not be above medium. Slow and steady is the secret. My impatient husband once tried to hurry along the recipe by blasting the heat. The end result was not only disappointing, it was hardly edible.


Melt the butter completely and then add the brown sugar. If you used unsalted butter, feel free to add a dash of salt. I don't bother doing that part because I typically use salted butter.

Stir the brown sugar into the mixture until there is NO butter on top. It is important that each ingredient gets added only after the previous ingredient has had a chance to fully incorporate.

The brown sugar is NOT entirely incorporated in this picture.
Make sure it is completely melted before going on to the next step.

The butter and brown sugar is completely melted together and you are ready to add the corn syrup.


Add the corn syrup slowly, stirring the entire time.


Slowly add the sweetened condensed milk, stirring constantly. Notice that stirring has been a pretty important part of the instructions so far. I didn't even dare take a picture of this part because I didn't want to stop stirring that long. My sweet husband assisted in the photography.


Doesn't that look beautiful? Yummmmm.


Now that your main ingredients are all combined, it is time to stir. Hope you aren't sick of stirring yet, because you have a fair bit of stirring coming up. Cook until the temperature of the caramel reaches 245 degrees. When measuring the temperature with the probe, make sure you are moving the probe around so that you are still able to scrape the bottom of the pan constantly so nothing burns on.


The temperature rises pretty quickly to 230 degrees. Those last 15 degrees seems to take forever. Sometimes, the temperature will rise a degree or two, and then fall again. Another tip: make sure the tip of the probe doesn't touch the bottom of the pan - that will give you a false temperature (much higher than what it actually is.)


The caramel will quickly start to boil with lots of bubbles rising to the surface. This is what the caramel typically looks like at about 230 degrees. Be very careful stirring because this mixture is not only very hot, it is super sticky!

Once the temperature pretty consistently stays at around 243 degrees, I pull it from the heat and add the vanilla. It will bubble up and sizzle so stir quickly.


Pour entire contents of pot into the prepared jelly roll pan. If you wait until the thermometer reads 245, it will likely be too hot by the time you add the vanilla and pour it into the pan. That makes the caramels slightly crunchy, which I don't like. The temperature will continue to rise even when you pull the pot and add the vanilla, so I error on the side of pulling it a few degrees under 245. 


Now comes the secret ingredient. My mother-in-law found this amazing smoked sea salt and it is the PERFECT addition to these sweet, smooth caramels. I sprinkle some on the entire batch and let it cool for a few hours.


After the caramel has had a chance to cool for a few hours, it is time to start cutting and wrapping. Since you sprayed the pan beforehand, the caramel comes out quite easily. I start on one end and slowly peel it off the pan. Have some cutting boards/mats ready to put the caramel on. I use a sharp pizza cutter to cut thin strips of the caramel and then cut the strips into little chunks. Feel free to cut whatever size and shape you fancy!


 Don't cut too many pieces at once. Start off with a few strips and then immediately wrap them with pieces of parchment paper or wax paper. I once cut them all up in the beginning and put them in a bowl. Since the caramel is still pretty soft, the pieces began to melt together and I had a big mess. Cut one or two strips at a time and wrap up all of those chunks, then go cut another strip and continue the process.


I used wax paper because I think it is a little easier to work with because it isn't as stiff as parchment paper. But, use whatever you have on hand. The wax paper allows you to see the caramels whereas the parchment paper offers the opaque white look.


 It's slow going, but I promise it's worth it! Keep cutting and wrapping...the end is almost near!
The finished product (minus the couple of caramels my husband and I ate
while I was wrapping...have to do quality control, right? :)


Friday, November 6, 2015

You're the best teacher HANDS DOWN!


A fun relatively inexpensive way to say "Thank you!" to your favorite teachers

So, I think I may have mentioned this before, but I LOVE to treat my niece Sydney's child care providers to little treats every now and then! I used to be a Lead teacher in the infant room at one of the YMCA Child Care Centers for many years and remember what it meant to feel appreciated. I want Sydney's teachers to feel the same way!

I created a "Favorite" sheet for each of the girls to fill out so I knew what their favorite scent, color, flower, food, restaurant, etc was. After all, if I'm going to give a gift, I want it to be something they will enjoy! So, armed with the list of their favorite scents, I headed to the local Bath and Body Works store and found some hand soap for each staff member. 


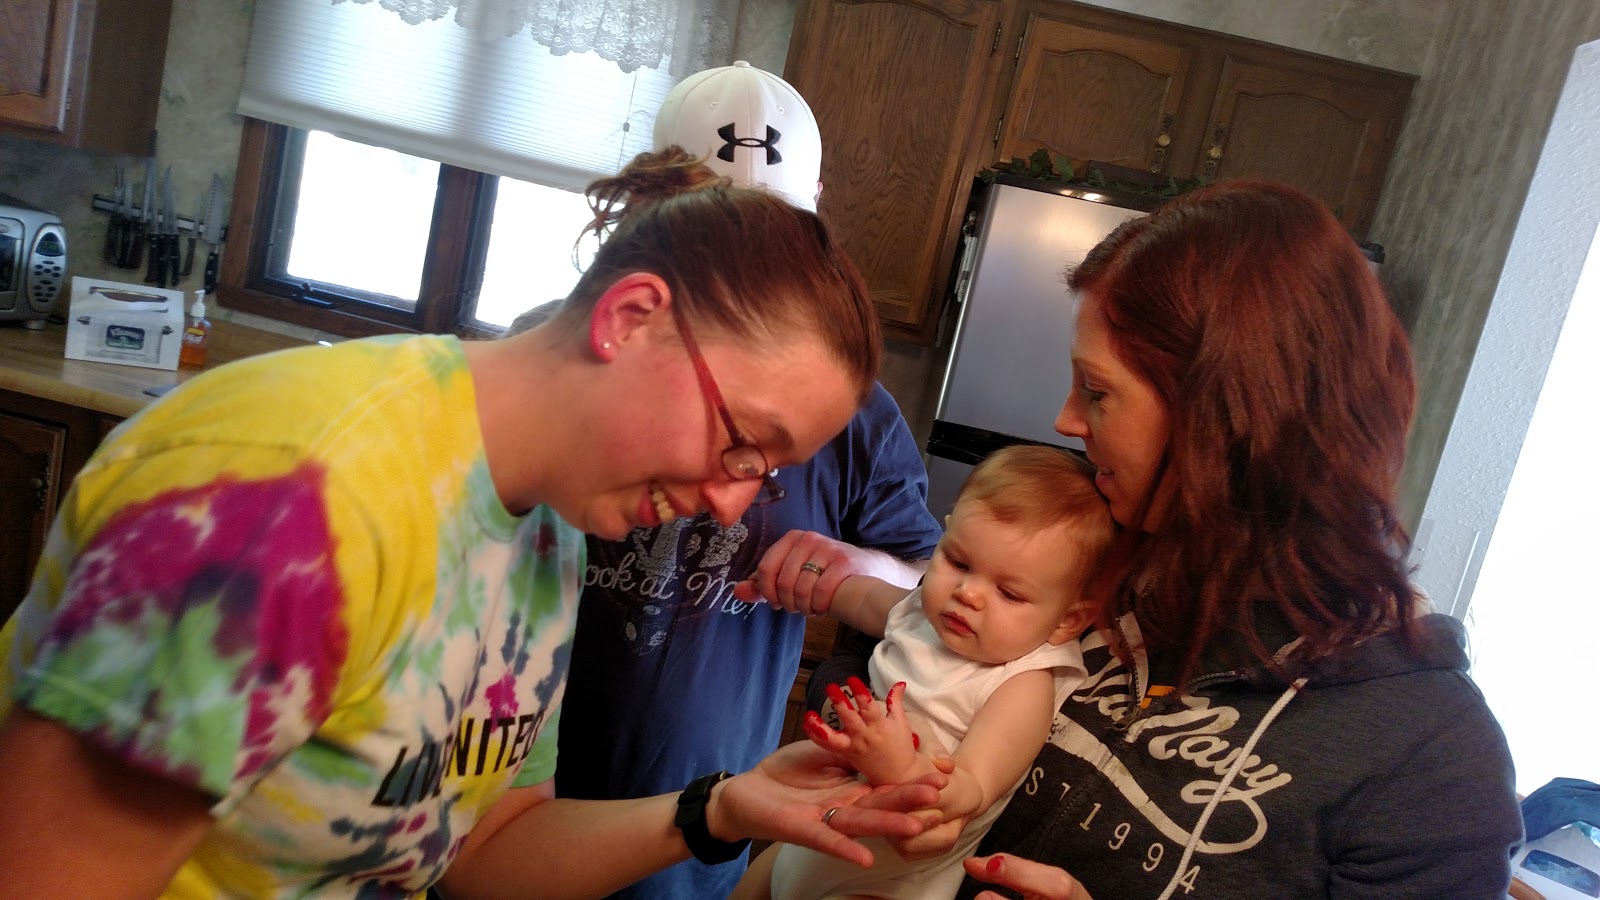
Now comes the fun part! I wanted to use a cute saying to put on the bottles. Of course, I am all about cheesy puns so I came up with, "You are the best teacher HANDS DOWN." Then, with Steph's help (Steph is Sydney's mom), we painted Sydney's hand and made some adorable hand prints.


 Because we used acrylic paint, I made sure to wash hands right away afterwards. Also, there was a strategic reason I wore my tie-dyed tee-shirt. If she managed to get paint on me, it wouldn't matter! :) Sydney was a trooper and let us get five adorable hand prints. 


Sydney did such a good job letting us paint her hand over and over and over!


After letting them dry, I cut them out and wrote out the cute saying that goes with it. I found some Christmas ribon and tied the handprints and quote onto each soap. I delivered them a few days later.


I know it doesn't seem like much, but I remember how much I appreciated even a simple "thank you," for taking care of someone's child. Little reminders that you are appreciated go a long way! Thank you Ann, Sierrah, Paige, Jordyn, and Janessa! The love you give to Sydney on a daily basis does not go unnoticed or unappreciated!