If you haven’t
checked out my previous blog post with a fun free crocheted bracelet pattern,
check it out here: http://erinscraftyendeavors.blogspot.com/2016/08/crocheted-bracelet.html
.
I used the
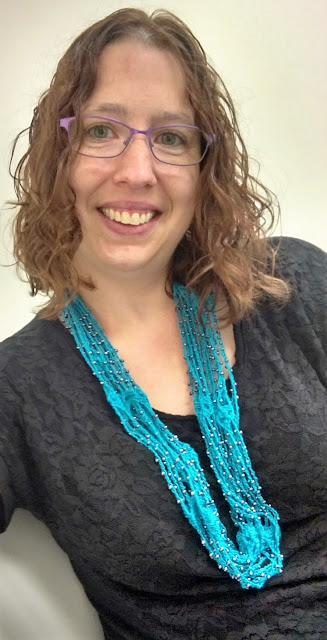
same beautiful turquoise thread to make this super cute beaded necklace. I have never
crocheted with beads before so I was a bit intimidated.
Luckily for me, I found
a super awesome blog post that had a video with a step-by-step of how to tackle
this pattern.
Here is her site: http://www.thecraftpatchblog.com/2016/05/beaded-crochet-wrap-necklace-video.html#.V73ra5grJhE
.
I like free patterns, but I like step-by-step videos even more! She does a
great job explaining what to do and how to do it!
 |
| A nice pop of color with my crocheted necklace! |
 |
| My previous blog post was on a crocheted bracelet. |
Materials Needed:
Some thin crochet thread (I used Aunt Lydia’s Classic 10 yarn)
3 containers of glass e-beads (I went with some pretty silvery/grey ones from JoAnn Fabrics)
Crochet hook size 3.5mm
Thin needle that will fit through the beads
The first step in this process is to put ALL of the beads onto your thread first. Trust me, it is easier this way. I started off with 2 tubes of beads (which you will see in the picture) but I ended up buying one more because I liked the look of the necklace when it was a bit thicker. It’s up to you how many overall rows/circles you want for your necklace. I ended up with 9 total and I needed 3 tubes of beads for that.
This part is a bit time consuming, but totally worth it! Pour all your beads onto a large flat surface with a slight lip to it so the beads won't roll off. This old plastic plate was perfect! Thread your thin needle with the yarn you chose and start threading your needle through each bead.
Keep going until they are all on there! You might be tempted to only start with a few, but it is easier to have them all on your thread so you don’t have to tie off and start over by adding more beads to your thread.
Once you
have all your beads on your thread, start the pattern with chaining. When you
get to the first bead part, you simply pull the bead up to where you are
working and chain AROUND it.

 |
| First bead is on! The step-by-step pictures show you how to chain around the bead. |
If this part seems confusing, check out the video –
it will make sense! Really, all you are doing is pulling up a bead and chaining
over it as you go. Super-duper easy.
The shell
part in-between each chunk of beads is a little confusing for the first row but
after that, it is pretty simple. The shell stitch keeps going in the middle of
the previous row’s shell stitch. Be careful not to twist the necklace as you
are working on it.
 |
| See how the shell stitches continue to build on each other? Each shell stitch is put in the chain space of the previous shell. |
As you get going, you will notice that the necklace seems overly long – ridiculously long, actually. That is normal because you will end up doubling it when you are done. When I was done with 9 rows (circles), I had used up almost all of my beads and decided I was done. I tied off and weaved in loose ends.


No comments:
Post a Comment