Tuesday, January 24, 2017

Heart Valentine's Day containers

Looking for a cute, easy, fun crochet pattern for Valentine’s Day? Look no further! This little heart shaped container is a perfect gift for your loved one, your Mom or Dad, sister or brother, co-worker, child care provider, teacher, boss, neighbor, mail carrier, dentist, etc. The list goes on and on. Who wouldn’t love getting a cute little crocheted heart filled with candies, love notes or flower petals?

End of foundation round

Here is the free crocheted heart container pattern. I used an H(5mm) hook and some worsted weight yarn in red, light pink, and white. This is a great stash buster pattern! Each heart uses such a small amount of yarn that you can make one in every color! I decided to make some for my niece’s child care providers last year. I figured, after they ate the candy inside, they could use the heart container as a ring holder, put it on their nightstand to hold chapstick, or hang it up in their classroom as a fun Valentine’s Day decoration!

About half-way through Round 1.


To start the pattern, I used a magic ring. If you haven’t figured out how to do this, I advise you to take the 10 minutes. It seriously won’t take you more than that. The link to the pattern also has a great video and pictures explaining it in great detail. This simple magic circle eliminates the large hole you see after starting a project like this. A magic circle is also the perfect way to start any stuffed animals or hats.

End of Round 2


End of Round 3.
If you wanted to, you could stop the pattern anywhere along these first couple of rounds and you would have a cute heart to use as a hair clip or an accessory on a hat. Or, you could make a bunch of hearts and string them together for a garland. The possibilities are endless!

Going in to the front loop in Round 4.


I altered the pattern slightly because I wanted the bottom to be flat instead of rounded. To do that, I did Round 4 only in the front loop. That creates a nice edge between the bottom and the sides.
This is how the  bottom looks when you crochet in the front loop of Round 4.
See how it is nice and flat? :)

Crocheting Round 5


A side view of Round 5

After crocheting the hearts, I wanted to add a little something to them to really make them pop. So, I found some pretty red, white, and pink patterned fabric pieces at JoAnn’s Fabric. 


I cut the fabric into a heart shape to fit inside the container. I used some tacky glue to glue the fabric to the bottom of the crocheted heart container and  let it dry for 24 hours.


Now it’s time to fill them with goodies! You can fill them with chocolates, conversation hearts, other Valentine’s Day candy, flower petals, or whatever your heart desires!


If you are looking for another fun Valentine’s Day crochet pattern, check out my adorable heart ear warmers blog post from last year. My niece, Emily, is modeling it in this picture.


No matter how you celebrate Valentine’s Day, make sure you give your loved ones a hug and let them know you love them. Life is too short to not tell people what they mean to you! Enjoy and happy crocheting! 


Monday, January 16, 2017

Crocheted popcorn garland


I love being crafty and I love making things for other people. I especially love getting commissioned to make something special for someone! 


So, you can imagine my excitement when my good friend Jackie contacted me to make some popcorn garlands for her and her Mom.


I found a couple of different patterns and showed them to Jackie. Her Mom really liked one of them. I found the free pattern on Ravelry. I used a 3.5mm hook and I Love this Yarn sport weight in white from Hobby Lobby. 


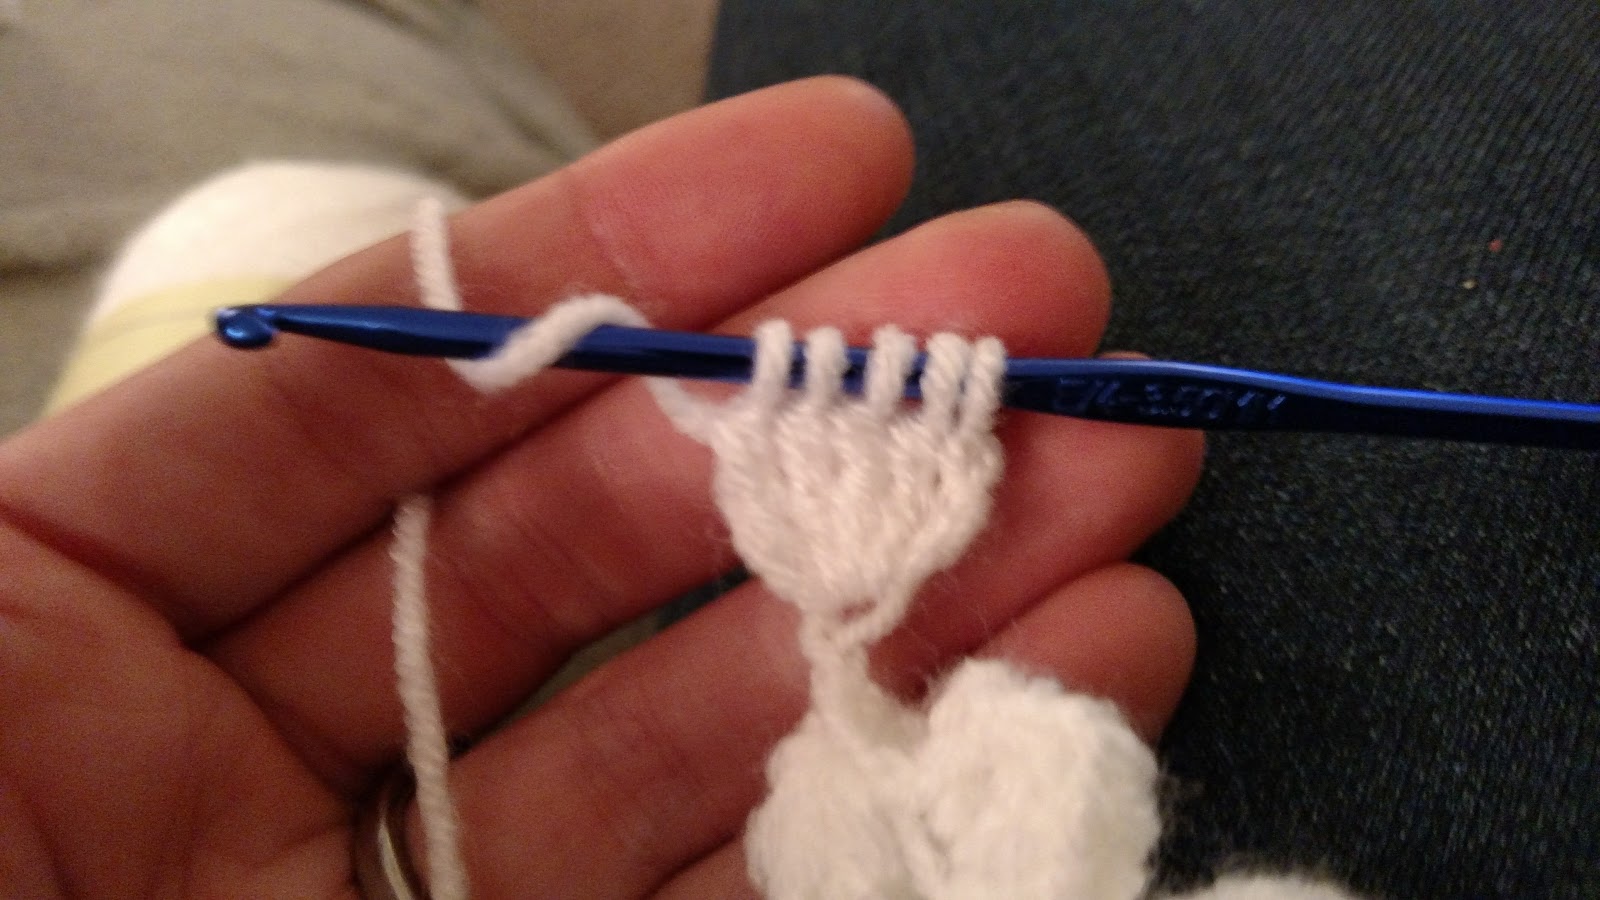
This particular pattern makes a long strand of connected popcorn pieces. It uses a cluster stitch where the last loop of 4 treble crochets are left on the hook and then you yarn over and go through all 5 loops on the hook at once (pictured above). 


I made a total of 4 strands, each between 6 and 8 feet long. It was a relaxing easy pattern once I got the hang of the treble cluster stitch. A bit time consuming, but when you are sitting in front of the TV, at least you feel like you get something accomplished! :)


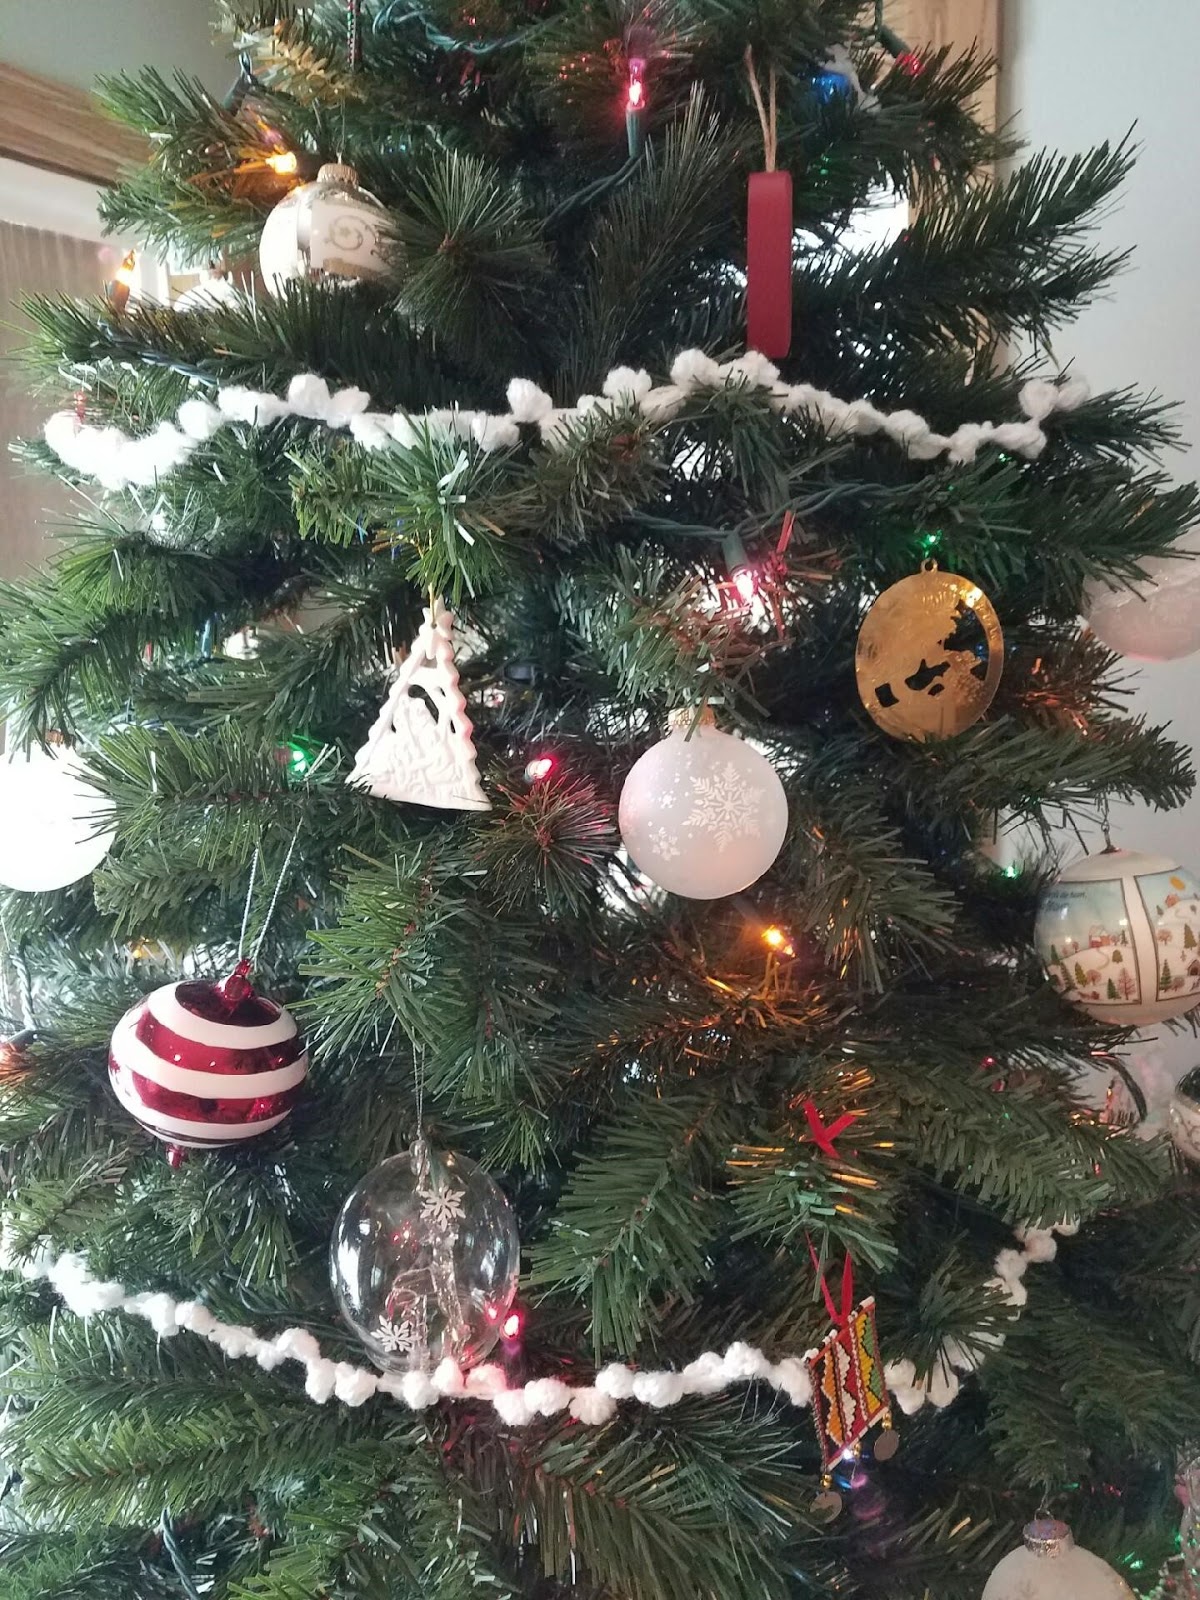
Don't those popcorn garland strands look so nice next to the beautiful ornaments!?


After I made the popcorn strands for Jackie's Mom, Jackie found another super cute popcorn pattern! The one she found makes individual popcorn pieces and then you string them together with whatever yarn/wire/twine you want! They turned out SUPER DUPER cute! I'll be posting that pattern soon!

Simply beautiful!

The four strands of popcorn garland ready to ship! 


Thanks, Jackie, for commissioning me to make some fun, beautiful, and simple popcorn garlands to add to your Mom's tree! I'll be doing a post soon on the cute popcorn pieces I made for your tree! I can't decide which one I like more - they are both so fun!

A few years ago, I made Jackie a beautiful waffle weave blanket for her sweet baby boy, Emmett. Here is a link to the waffle weave blanket pattern.

Thursday, December 29, 2016

Cube decorating contest


Soooo, when your workplace decides to throw a cube decorating contest during the holiday season, what does your team of Early Childhood specialists do? Win, of course! 

I don’t think the Christmas party committee realized the monster they created when they opened up a contest to see who could decorate their “cubicle” area the most festive for the holiday. All of us at Child Care Aware have been in a situation where you are decorating your classroom or making an art activity for the kids with little to no budget money and LOTS of creativity. We know how to make anything out of nothing. Give us a little construction paper and glitter and we can make amazing things!

So, our crew consisted of seven highly competitive individuals who wanted to win. We got together and planned what our theme was going to be and started divvying out tasks to whoever had the right materials and the time/energy to devote to the task! We all came back to the office with boxes of construction paper, glitter, glue, cotton balls, scissors, Christmas trees, decorations, fishing wire, tape, cellophane paper, toilet paper tubes, brown sack lunch bags etc. You name it, we had it.


We decided to go with a gingerbread theme. We had two cubes to decorate but wanted them to be connected to each other visually. My work cube (which I share with Brittany) was going to be the main gingerbread house and the training department’s cube next door would be the outside/backyard area. 

We covered the whole outside of our cube with brown butcher paper and then put up construction paper glittered lights, gumdrops on the bottom, and lollipops in the front (made of wrapping paper tubes and colorful plastic plates). Katie made tons of cute things out of construction paper, including the adorable snowmen, the windows with the wreaths, and the street signsI managed to find some gigantic googly eyes that I placed on one of the snowmen. The rest of the colorful plastic plates were covered with clear cellophane wrap and put up as candies.

"Candy" made out of colorful plastic plates and cellophane wrap.

 We put up a trim of fake snow and covered the top with cotton balls all stretched out. The “roof” was made with wrapping paper tubes and a bunch of lunch paper bags arranged to look like shingles. A few more cotton balls on the top of the roof made it look like a fresh batch of snow had just fallen.


Brittany brought her Christmas tree and we decorated it with candy ornaments, candy canes, and lights. I brought a bunch of fake wrapped presents that Jon and I had created years ago. They looked perfect under the tree! We even found some cute candy decorations that went along perfectly with the theme! We made some paper chains ($1 section at Target!) to put up in the background.


Inside the gingerbread house, we created a fireplace with construction paper bricks, a real wreath, and a stocking for each of our co-workers. Emily created a realistic fire with toilet paper tubes and red, orange, and yellow construction paper flames. I brought my stuffed Santa and Brittany had her daughter write a note to Santa. She even brought a fake cup of milk from her kid’s dramatic play set at home. With a plate of cookies (felt gingerbread), our mantle was complete. 


We’re not quite sure who took a “bite” out of one of our gingerbread men. We’re pretty sure it was a member of a competing team! It was clever, whoever it was!

Our fireplace, mantle, stockings, and fire. Look what a little
construction paper and creativity can do!

Now, to connect our gingerbread house to the backyard. Emily’s kids helped color paper plates to look like red and white swirly peppermint candies and we taped them to the floor leading to the next cube. 


A few paper snowflakes, cut out candy cane decorations, and gingerbread also helped set the scene. Some light-up candy canes lead the way to the backyard area where there are a few more gingerbread people skating on an ice rink (aluminum foil with a border of fake snow). 


The gingerbread people were made by Katie out of cardboard and some markers and glitter! A few of us had small trees at home so we brought those in and placed them near the skating rink to look like trees outside.

Some snow falling from the sky and snow drifts on top of the cubes.

Emily and I created the illusion of snow falling by using some fishing line and tying cotton balls in random places. Deanna used her dye-cut machine to create a bunch of adorable tiny snowflakes which we also strung on the fishing line and hung from the ceiling. A few evergreen trees cut from paper and other cute lil snowmen/stuffed animals were spread throughout the area.

When the time for judging came around, Katie had made homemade gingerbread cookies (a little bribe doesn’t hurt!?) for the judges to eat as they walked by. As if they needed any convincing. There were a few other cubes that were nicely decorated, but nothing quite like our theme. 


Of course, we won the best decorated cube contest, winning us the adorable ugly trophy for the year. Now, on to next year’s planning…. Can never start thinking too early… ;)


Image may contain: 1 person, smiling, indoor
Katie showing off the ugly traveling trophy that isn't going to travel! :)
Image may contain: 2 people, people standing and indoor
Deanna and Katie standing in their cube....errr....gingerbread backyard

Check out the Child Care Aware of ND facebook link for a few more panoramic pictures.


Check out the adorably hideous traveling trophy we won! Who am I kidding? Traveling trophy!? That would mean someone else would have to win next year and we aren't going to let THAT happen!

Monday, November 21, 2016

Crocheted snowflake and star ornaments

I love my job! I get the privilege of working with child care providers and directors in the eastern part of North Dakota. I love that we share a similar passion – to provide the best quality care we can for our future generation. Through the past year and a half, I have been working with a handful of directors who are working hard on a director’s credential called Aim4Excellence. It is intense. It is time consuming. It is in-depth. Each module takes about 6 weeks and there are 9 modules. That’s a lot of hours. Recently, a few of the directors I’ve been working with have finished this daunting task. The last time I met with them, I wanted to give them a little something to thank them for all the hard work they have put in. I’m pretty sure you can guess that it was homemade. After all, I do like being crafty. ;) Since Christmas is around the corner (yippeeee!), I decided to find some cute crocheted Christmas decoration patterns and try my hand at making them.

The first one I found was for snowflakes. The free crochet pattern can be found here. I used a G sized crochet hook and a couple of different colors of worsted weight yarn. Loops & Threads Impeccable yarn in Teal, I Love this Yarn in graphite and I Love this Yarn in white sparkle. The white sparkle yarn is absolutely perfect for this pattern! Just enough sparkle to look like a snowflake. :)

The beginning of the pattern starts with a magic ring.


Then, I dug out my sparkly Modge Podge (seriously, this is so cool!) and dabbed a bit on the front of the snowflakes. Not only does it add a nice fun sparkle, it stiffens the yarn so that the snowflake doesn’t curl in on itself. Multi-purpose AND pretty – can’t get better than that! Don't forget to continually tighten your magic circle so that the hole in the middle stays small. It will want to stretch as you go.


When you are putting the Modge Podge on, it will look really white. Be patient, once it dries, it will be clear and only show the sparkles. Don't put it on too thick because the sparkles kinda clump together. After drying, I tied the snowflakes together to make a long garland.


I spaced the snowflakes about 3 inches apart using my husband's old-school Transformers ruler. :)


The next project I took on was crocheted stars. I found this free pattern on Pinterest. I used a G sized crochet hook and used three different festive colors. I Love this Yarn in sparkle white, I Love this Yarn in Jelly Bean, and Yarn Bee Dreamy Chenille in black cherry.  

I started the yarn with a magic circle for all of the colors EXCEPT for the red. That yarn tends to break when I try to tighten the magic circle. I stuck with a simple chain 4 and slip stitched into the first chain to form a circle. Then, I put the puff stitches in that. 


The beginning of this pattern using a magic circle
Starting Round 2 of the pattern


Once again, I used the sparkly Modge Podge to stiffen the yarn and add that nice little sparkle. These turned out so cute! I decided to turn these into tree decorating ornaments so I put a little bit of red yarn at the top and created a loop so it could hang. 


Starting Round 3 of the pattern


Finished pile of stars! Now comes the sparkly part!

                                                                                                                                                               
My husband graciously offered to burn the ends of the yarn so it wouldn’t unravel. Any time my husband can play with fire, he’s a happy man. Is that a Y chromosome thing? 


I found a cute cardboard container in the dollar section at Target and managed to find some matching tissue paper in my tissue paper storage container. Win win! Relatively cheap gift and I was able to use up some scraps of yarn that had been in my stash for quite a while.


If you are looking for an easy Christmas crochet pattern to use up yarn and to make a cute creative gift for someone in your life, look no further!